
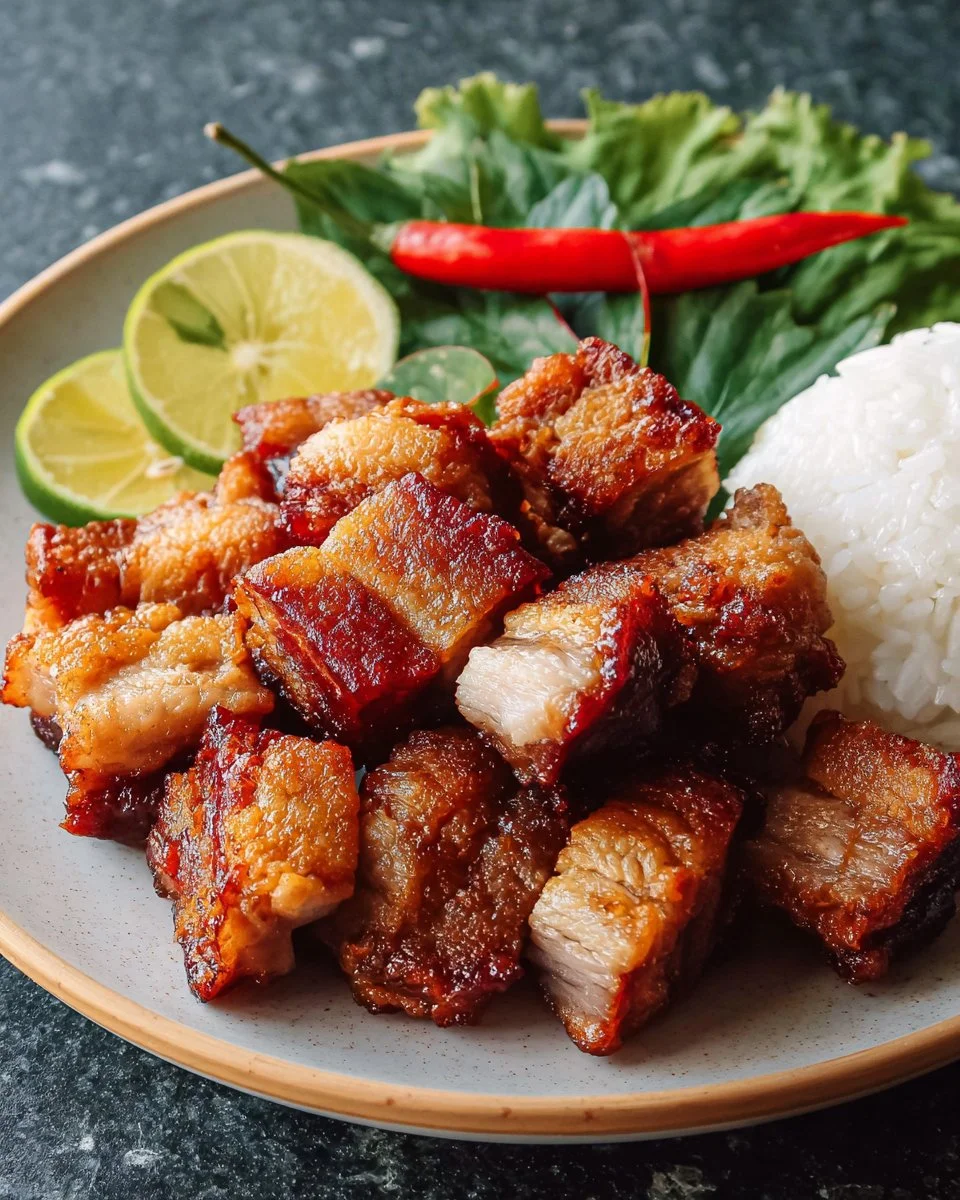
30-Min Crispy Pork Belly Thai-Style: Your New Favorite Comfort Food Delight!
Imagine this: it’s a weekend evening, and the tantalizing aroma of crispy pork belly wafts through your home, instantly transporting you to the vibrant streets of Thailand. This 30-Min Crispy Pork Belly Thai-Style isn’t just a dish; it’s a sensory experience, a culinary adventure straight from family gatherings I cherished as a child. I remember clinking chopsticks with my siblings, battling over the last, irresistible crunchy piece and lingering over laughter and stories – it was pure magic. What makes this pork belly recipe special compared to others is not just its lip-smacking crunch, but the depth of flavor, blended with an easy technique that even a novice cook can master in just half an hour.
Trust me; once you’ve tasted the juicy, tender insides paired with a fantastically crispy outer layer, you’ll understand why this dish has a special place in my heart. In this blog, I promise to share my secrets on how to achieve that perfect bite in mere minutes! So, roll up your sleeves and get ready to impress your family and friends (or just treat yourself to a one-person feast!). Let’s dig in!
What are 30-Min Crispy Pork Belly Thai-Style?
Right out of the heart of Thai cuisine, crispy pork belly is a favorite among food lovers, and for good reason! This dish brings together the richness of tender pork belly, seasoned to perfection, and fried to create a wonderful contrast between the crunchy exterior and juicy interior.
The unique flavor profile of the 30-Min Crispy Pork Belly Thai-Style is blessed with a hint of fish sauce, a sprinkle of sugar, and a dash of white pepper, creating a savory sensation that dances beautifully on your palate. You’ll want to make these for special occasions, weeknight dinners, or simply when you crave something divine. They are perfect for sharing but irresistible enough that you might want to keep them all to yourself.
Why You’ll Love This Recipe
-
Quick and Easy: This recipe takes only 30 minutes from start to finish, making it ideal for weeknight dinners or impromptu gatherings. Unlike takeout, you can whip these up and impress your guests right at home, without the long wait or hefty delivery fees.
-
Cost-Effective: Making crispy pork belly at home means you save a bundle compared to restaurant prices. With just a few simple ingredients, you get a delicious dish without breaking the bank. Plus, you can buy the pork belly in bulk and make a larger batch for freezer meals!
-
Customizable: Want to spice things up? Try adjusting the seasonings or dipping sauces! You could go traditional with Nam Jim Jeaw or experiment with sweet chili sauce for an extra kick. I’ve even tried adding a bit of honey for a hint of sweetness, and it was a total game-changer!
-
Healthier than Takeout: When you make your own crispy pork belly, you control the quality of ingredients and the oil you use. Plus, you can serve it with a side of fresh salad or rice to balance the richness of the pork, making it a complete meal.
-
Achievable at Home: While restaurant versions can sometimes seem daunting to recreate, I promise you that with my step-by-step instructions, you’ll be whipping up this dish like a pro – no fancy equipment required, just a stove or deep fryer!
Ingredients Section
Before we dive in, here’s what you’ll need to create these mouthwatering 30-Min Crispy Pork Belly Thai-Style bites:

-
1 lb pork belly, skinless: Look for thick-cut slabs for the best results. If you’re buying from a butcher, ask for skinless to save on prep time.
-
1 ½ tablespoon fish sauce: Use high-quality fish sauce for authentic flavor. Brands like Red Boat or Tiparos are excellent choices.
-
1 teaspoon sugar: Regular granulated sugar works perfectly here.
-
½ teaspoon ground white pepper: For a bit of subtle heat that complements the pork beautifully.
-
2 tablespoon all-purpose flour: Helps create that signature crunch. Gluten-free flour can be substituted if needed!
-
2 tablespoon cornstarch: This is the secret weapon for extra crispiness.
-
Frying oil, as needed: Use a neutral oil with a high smoke point like canola or peanut oil.
-
Nam Jim Jeaw (optional dipping sauce): This Thai dipping sauce adds a heavenly kick, but feel free to try your favorites!
Prep Notes: Make sure your pork belly is at room temperature before cooking so that it fries evenly.
Step-by-Step Instructions
-
Prepare the Pork: Pat the pork belly dry with a paper towel. With a sharp knife, carefully remove the skin, leaving a bit of fat for flavor. Cut it into 1-inch wide strips and then into ¾-inch thick pieces.
-
Season the Meat: In a bowl, combine the pork with fish sauce, sugar, and white pepper. Massage the mixture into the pork for about a minute until the sugar dissolves and everything is well incorporated.
-
Coat for Crispiness: In a separate bowl, mix the all-purpose flour and cornstarch together. Sprinkle this mixture over the seasoned pork and mix to coat evenly. Allow it to sit for 5 minutes to absorb the flavors.
-
First Fry: Heat at least 1 inch of frying oil in a wok or medium pot to 350°F (175°C). Carefully add half of the pork pieces into the hot oil and fry for about 2 minutes, or until they just start to turn golden. Remove and allow to cool for a few moments. Repeat with the second half.
-
Second Fry: Raise the oil temperature to 385°F (196°C). Add all the pork back into the hot oil and fry for 70-90 seconds until they reach a deep golden brown color.
-
Drain: Once fried, remove the pieces and let them drain on a paper towel to soak up excess oil.
-
Serve: Allow the pork to cool slightly before serving. Dive into that crispy goodness and enjoy!
Expert Tips & Tricks
-
Master the Temperature: Keeping the oil at the right temperature is crucial for achieving that signature crunch. A candy thermometer is your best friend here!
-
Don’t Overcrowd the Pan: Fry in batches to ensure each piece gets crispy, and avoid steaming them instead.
-
Storage: Leftovers can be stored in an airtight container in the fridge for 2-3 days. Re-crisp them in the air fryer or oven for best results.
-
Make-Ahead: You can season the pork belly a few hours in advance and refrigerate it. Just remember to bring it back to room temperature before frying for the best results!
-
Troubleshooting: If the pork isn’t frying up crispy, check the oil temperature and adjust accordingly. If it’s too cool, the pork will absorb it instead of frying!
Serving Suggestions
These crispy bites deserve a spotlight! Serve them alongside fluffy jasmine rice and a vibrant green salad to balance out the richness. For extra flair, garnish with fresh cilantro, lime wedges, or serve with a variety of dipping sauces. Whether it’s a cozy family dinner or a special occasion, they’ll surely impress!
Variations & Substitutions
Feeling creative? Try these variations:
-
Flavor Combinations: Add spices like garlic powder or paprika to the coating for a flavorful twist.
-
Dietary Adaptations: For a gluten-free option, swap the all-purpose flour with a gluten-free baking mix or almond flour.
-
Seasonal Specials: In the fall, try adding a sprinkle of pumpkin spice to the pork mixture for a unique seasonal flavor!
Nutrition & Storage Info
- Prep Time: 15 minutes
- Cook Time: 15 minutes
- Total Time: 30 minutes
- Yield: Serves 4 (about 2 pieces per serving)
- Estimated Calories: 400-500 per serving
- Storage: Keep leftovers at room temperature for 2 hours max, then refrigerate for up to 3 days or freeze for a month.
FAQ Section
-
Can I use skin-on pork belly?
Yes! If you prefer extra crunch, feel free to leave the skin on. Just adjust cooking times slightly, as skin will take longer to crackle. -
Is this recipe suitable for meal prep?
Absolutely! These make excellent meal prep options. Just store them in the fridge and reheat for a quick meal. -
Can I bake instead of frying?
While baking won’t get you the same texture, you can roast the pork belly in the oven at 400°F (200°C) for a healthier alternative. -
How spicy is this dish?
The spiciness mainly comes from the optional dipping sauce, so you can control the heat to your preference! -
What’s the best way to reheat leftovers?
To retain crispiness, reheat in an air fryer at 350°F until hot or in a conventional oven. -
Can I make these ahead of time?
Absolutely! You can season and prep the pork, store it in the fridge, and fry just before serving. -
What can I use instead of fish sauce?
A vegan alternative is soy sauce or tamari for a gluten-free option. -
What should I serve with this dish?
It pairs beautifully with rice, pickled vegetables, or a simple Asian-style salad. -
Are there any good dipping sauces?
Nam Jim Jeaw is a classic Thai choice, but sweet chili sauce or peanut sauce also work well! -
Can I use a different meat?
Yes! Chicken thighs or firm tofu can be substituted, although cooking times may vary.
Conclusion
In the world of comfort food, the 30-Min Crispy Pork Belly Thai-Style stands out as an irresistible treat that’s easy to make and even easier to love. This recipe encapsulates the joy of home-cooked meals, filled with rich flavors and delightful textures! I can’t wait for you to try it. Don’t forget to leave your thoughts in the comments – I love hearing your feedback and experiences! And if you enjoyed this recipe, I have plenty of other exciting dishes lined up on my blog, just waiting for you to discover. Happy cooking!

30-Min Crispy Pork Belly Thai-Style
Ingredients
Method
- Pat the pork belly dry with a paper towel. With a sharp knife, carefully remove the skin, leaving a bit of fat for flavor. Cut it into 1-inch wide strips and then into ¾-inch thick pieces.
- In a bowl, combine the pork with fish sauce, sugar, and white pepper. Massage the mixture into the pork for about a minute until the sugar dissolves and everything is well incorporated.
- In a separate bowl, mix the all-purpose flour and cornstarch together. Sprinkle this mixture over the seasoned pork and mix to coat evenly. Allow it to sit for 5 minutes to absorb the flavors.
- Heat at least 1 inch of frying oil in a wok or medium pot to 350°F (175°C). Carefully add half of the pork pieces into the hot oil and fry for about 2 minutes, or until they just start to turn golden. Remove and allow to cool for a few moments. Repeat with the second half.
- Raise the oil temperature to 385°F (196°C). Add all the pork back into the hot oil and fry for 70-90 seconds until they reach a deep golden brown color.
- Once fried, remove the pieces and let them drain on a paper towel to soak up excess oil.
- Allow the pork to cool slightly before serving. Dive into that crispy goodness and enjoy!