Crispy Garlic Chive Dumplings: Your New Favorite Comfort Food
Have you ever had a dish that transports you back in time to your grandma’s kitchen, filled with laughter and the scent of something extraordinary? For me, it’s the Crispy Garlic Chive Dumplings that my family has loved for generations. Growing up, these dumplings were a staple at our family gatherings; the smell of garlic and fresh chives sizzling in the pan always brought everyone to the table.
What sets my version apart? I’ve spent years perfecting the recipe, ensuring that each dumpling is not only crispy but also packed with flavor, unlike the soggy versions you sometimes find in takeout boxes. The combination of chewy tapioca starch and rice flour creates a delightful texture, while the vibrant garlic chives add fresh depth.
In this recipe, I promise to help you recreate that warmth and nostalgia in your own kitchen. You’ll learn how to make these delightful dumplings from scratch, along with a mouthwatering dipping sauce that pairs perfectly. So gather your ingredients and let’s dive into the world of crispy, garlicky goodness!
What Are Crispy Garlic Chive Dumplings?
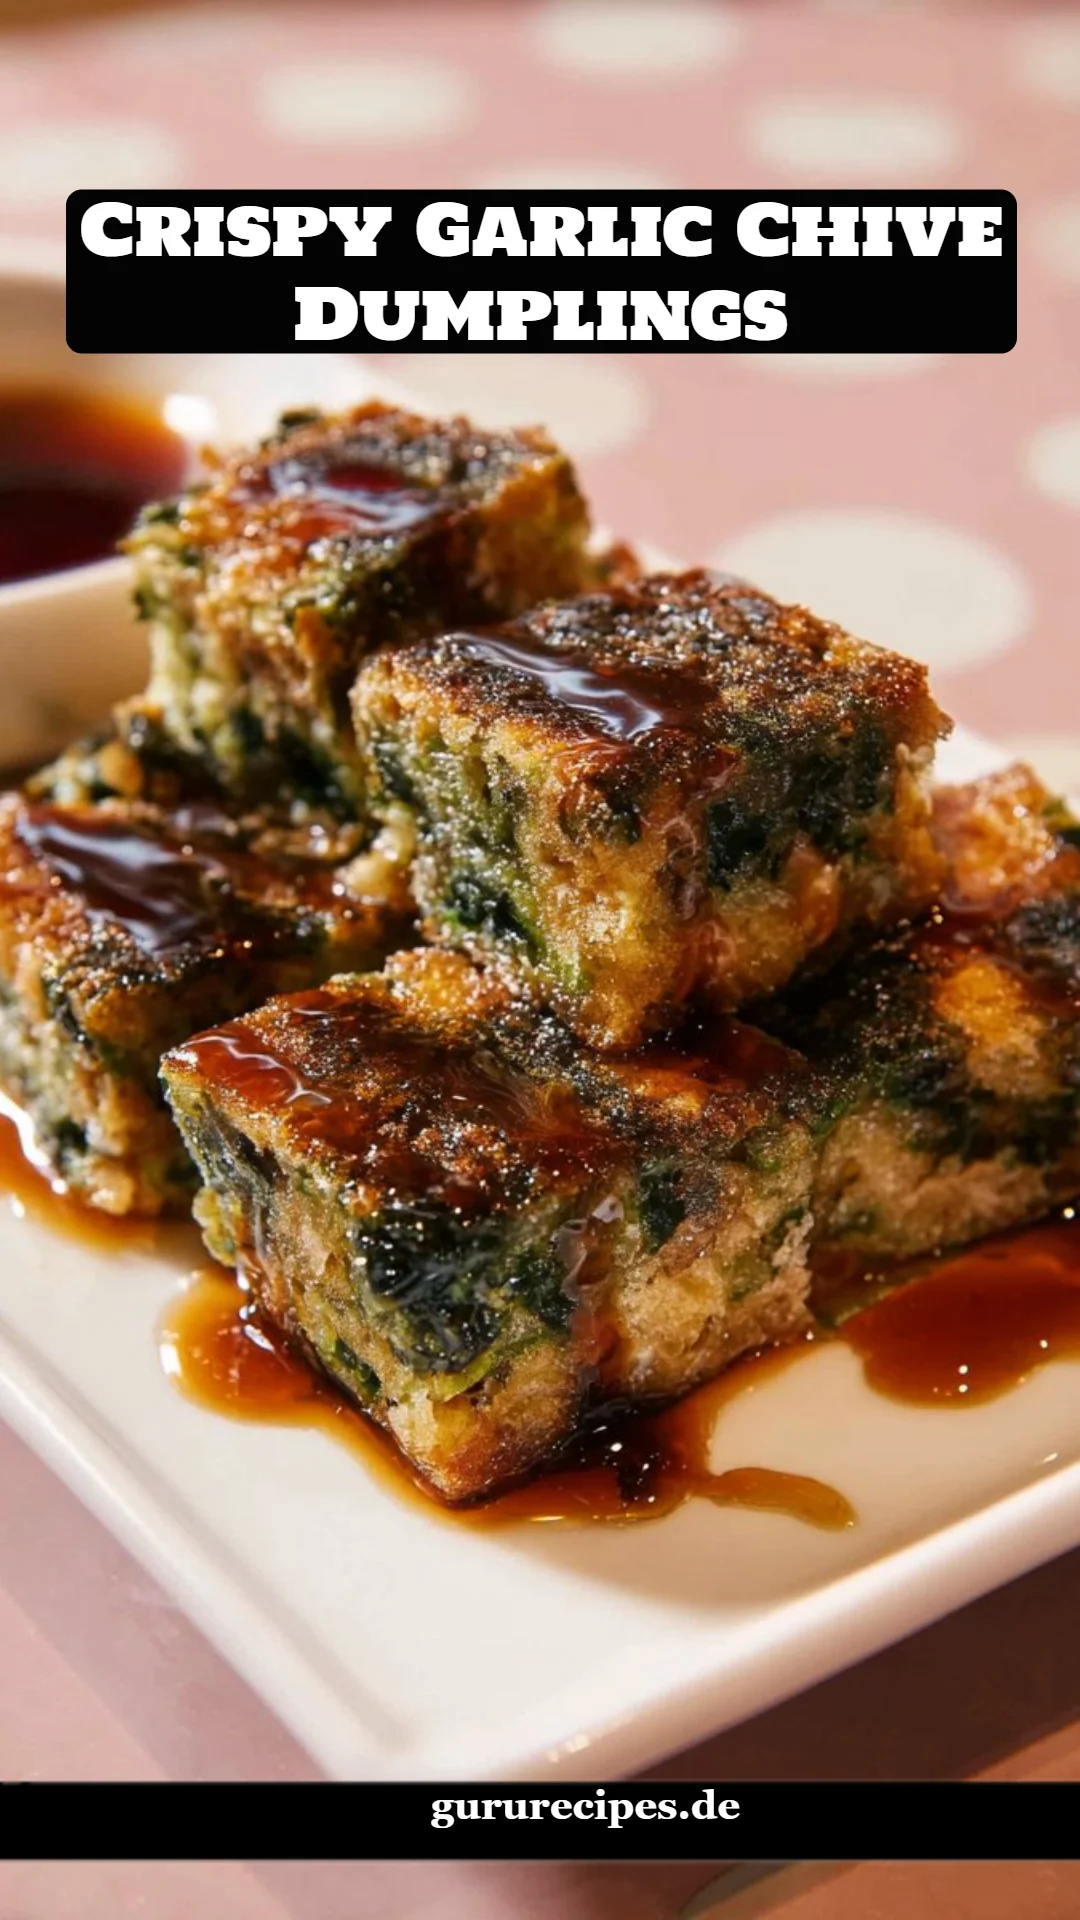
Crispy Garlic Chive Dumplings, often found in various Asian cuisines, originate from regions where garlic chives are a staple ingredient. These dumplings boast a perfect balance of flavors, with a savory filling enveloped in a crispy exterior. The garlic gives an aromatic depth, while the chives add a touch of mild onion flavor that elevates every bite.
The texture of these dumplings is what truly makes them unique. The outside is crispy and golden, achieved through a quick fry after steaming, while the inside remains soft and chewy. They are perfect for any occasion – whether you’re preparing a cozy dinner for the family or an impressive appetizer for guests at a gathering.
Why make these dumplings from scratch? Not only are they more flavorful than store-bought versions, but you also get to customize the ingredients to your liking. Plus, there’s an unbeatable joy in creating a dish that brings people together.
Why You’ll Love This Recipe
-
Unparalleled Flavor: You won’t find the depth of flavor in any restaurant or frozen version. This recipe highlights fresh ingredients, letting the garlic chives shine bright.
-
Cost-Effectiveness: Making Crispy Garlic Chive Dumplings at home is far more affordable than ordering takeout. With just a handful of ingredients, you can treat yourself and your family without breaking the bank!
-
Customization: Love spice? Toss in some minced chilies. Want a vegetarian twist? Add more veggies to the filling. This recipe is designed to adapt to your preferences!
-
Simple Process: While it might seem daunting to create dumplings from scratch, this recipe breaks it down into easy, manageable steps. You’ll be surprised at how simple it is!
-
Perfect for Meal Prep: Make a big batch and freeze some for later. These dumplings freeze beautifully, making them an excellent option for quick meals. Just steam and fry when you’re ready to enjoy!
Ingredients
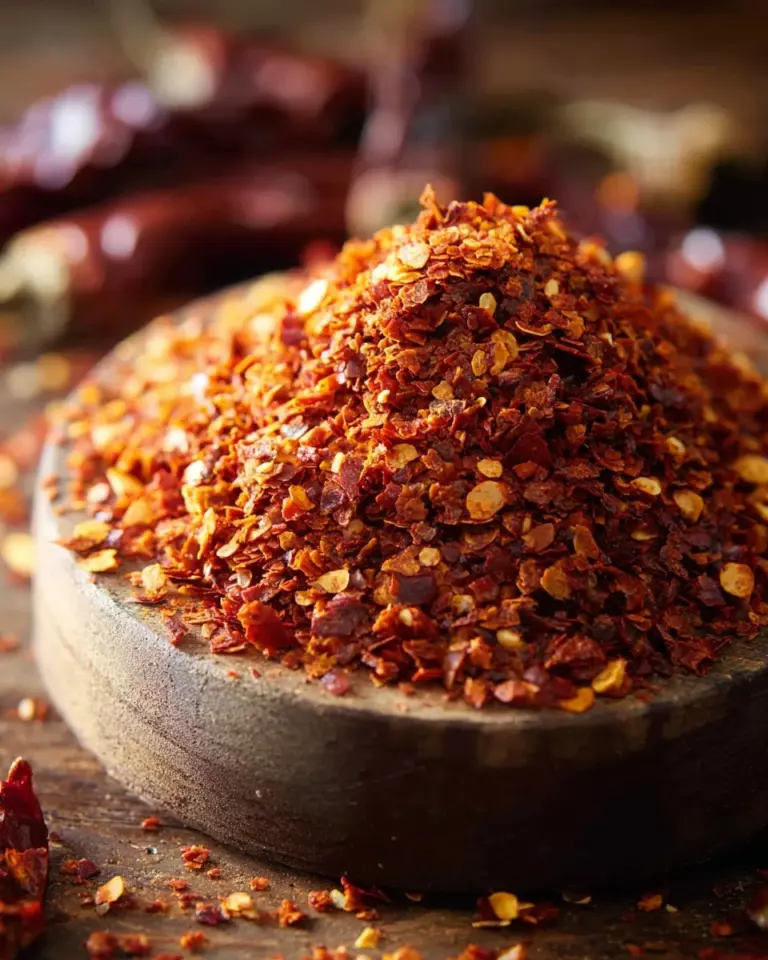
- Garlic Chives: 230 g (½ pound) – Fresh chives are key! Look for vibrant, sturdy ones.
- Sugar: 2 tsp – Adds a hint of sweetness to balance flavors.
- Soy Sauce: ½ Tbsp – Use a quality brand for better flavor, like Kikkoman.
- Salt: ½ tsp – Essential for seasoning.
- Baking Soda: ¼ tsp (optional) – Can help with texture, but not necessary.
- Neutral Oil: 2 tsp – For sautéing; canola or vegetable oil works well.
- Garlic: 1 clove, finely grated or minced – Fresh garlic enhances the flavor.
- White Pepper: ¼ tsp – Offers a different profile than black pepper.
- Rice Flour: 100 g – Provides a chewy texture.
- Tapioca Starch: 100 g – Adds a delightful chewiness.
- Water: 1 cup (240 ml) – Required for the batter.
For the Dipping Sauce:
- Sugar: 1 Tbsp – Balances the acidity.
- Water: 1 Tbsp – Just to dissolve the sugar in the sauce.
- Vinegar: 1 Tbsp – For tanginess, rice vinegar is ideal.
- Sweet Soy Sauce: 1 ½ Tbsp (such as ABC kecap manis) – Adds sweetness and richness.
- Soy Sauce: 1 Tbsp – For an umami kick in the sauce.
- Chilies: 2-3 teaspoons sambal oelek or minced Thai chilies to taste – Adjust for heat!
Ingredient Notes:
- Quality Matters: Opt for fresh garlic chives and high-quality soy sauce for the best flavor.
- Substitutions: Frozen garlic chives can be used in a pinch, though fresh is recommended for an aromatic experience.
Step-by-Step Instructions
-
Prepare the Chives: Cut the bottom 1.5 inches off the garlic chives and wash them thoroughly. Slice them into small pieces and place them in a mixing bowl. Add ½ tsp of salt, 2 tsp of sugar, ½ Tbsp of soy sauce, ¼ tsp of baking soda (if using), ¼ tsp of white pepper, 2 tsp of neutral oil, and 1 clove of minced garlic. Mix well and let sit for at least 20 minutes to allow the flavors to meld.
-
Make the Dipping Sauce: In a bowl, combine 1 Tbsp of vinegar, 1 Tbsp of water, and 1 Tbsp of sugar, stirring until dissolved. Add 1 ½ Tbsp of sweet soy sauce, 1 Tbsp of soy sauce, and chilies. Mix well and set aside.
-
Prepare the Batter: In a pot, combine 1 cup of water, 100 g of rice flour, and 100 g of tapioca starch. Stir until smooth and heat on low, constantly stirring until thickened. Remove from heat.
-
Combine the Mixture: Fold the prepared garlic chives into the batter until fully incorporated. Grease a 7-inch round cake pan and line the bottom with parchment paper. Pour in the batter and smooth the top.
-
Steam: Preheat a steamer with boiling water. Place the pan inside and steam for 15-20 minutes until cooked through (the batter should be set). Visual cue: The top should be slightly firm to the touch.
-
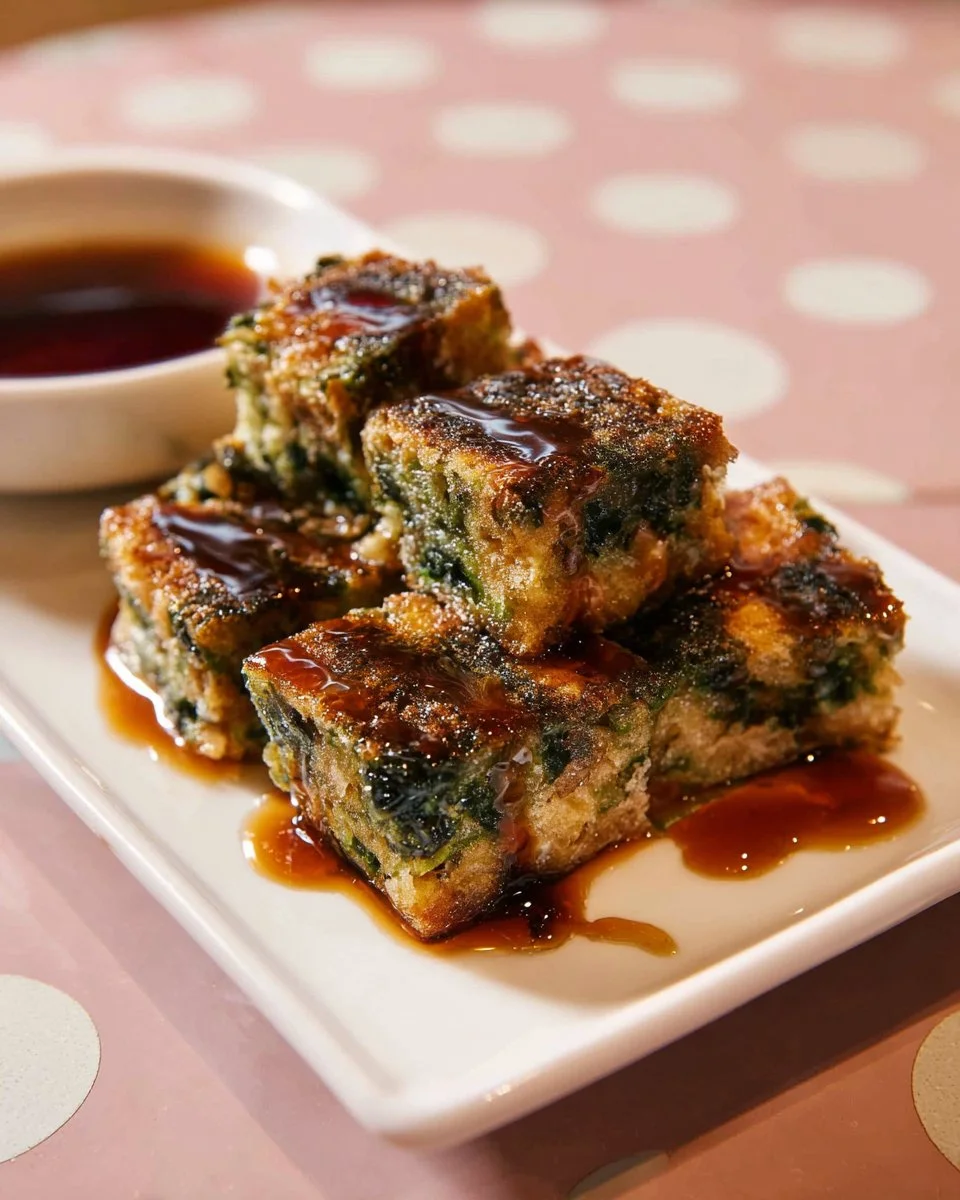
Cool and Cut: Let the dumpling mix cool completely in the pan before cutting into bite-sized pieces. This helps maintain shape and texture.
-
Fry for Crispiness: In a non-stick pan, heat 1-2 tsp of oil over medium heat. Fry the dumpling pieces on both sides until crispy and golden brown, about 3-4 minutes per side.
-
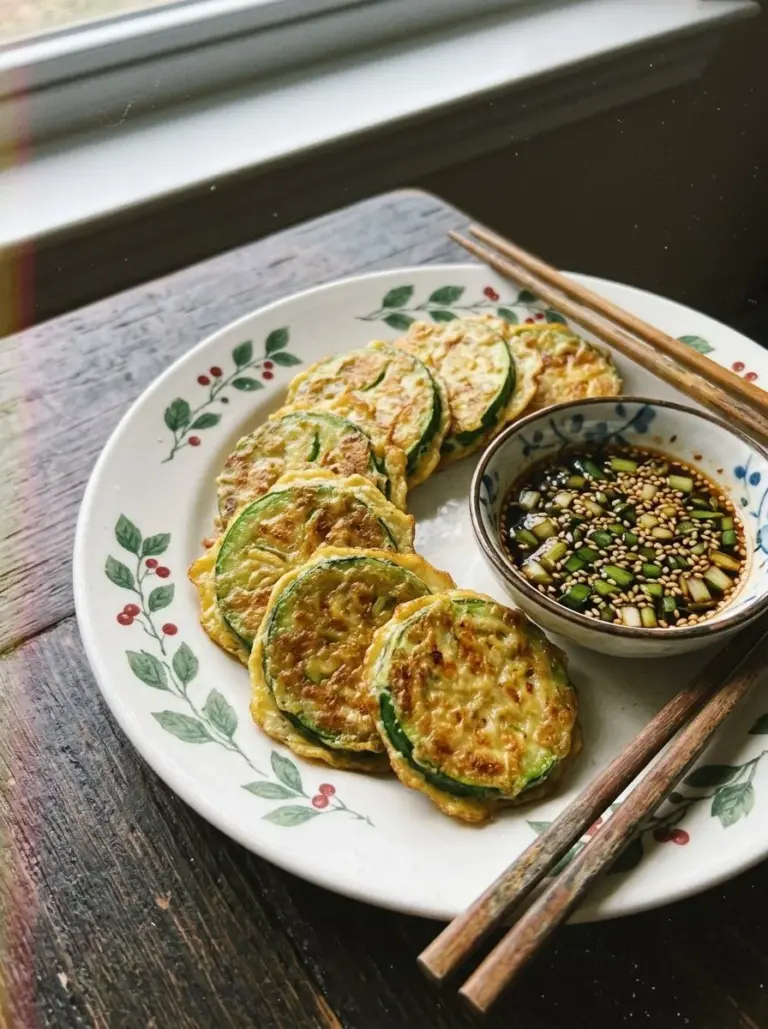
Serve with Dipping Sauce: Serve hot with the prepared dipping sauce for a delightful experience!

Expert Tips & Tricks
- Ingredient Quality: Using high-quality garlic chives and soy sauce can make a significant difference in the dish’s overall flavor.
- Storage Recommendations: Store any leftovers in an airtight container in the fridge for up to 3 days. To reheat, steam or pan-fry until hot.
- Make-Ahead Instructions: Prepare the dumplings ahead of time, leave them uncooked, and freeze them. Fry from frozen when ready to enjoy!
- Troubleshooting: If the dumplings are too sticky, adjust with a little more rice flour. If they are falling apart, ensure the batter isn’t too wet.
- Cooking Technique: For extra crispy dumplings, add a sprinkle of additional tapioca starch when frying.
Serving Suggestions
Pair these Crispy Garlic Chive Dumplings with a simple side of sautéed greens or a light Asian salad for a complete meal. Presentation is key, so consider serving them in a bamboo steamer for a beautiful touch. Perfect for family dinners, game nights, or casual get-togethers, these dumplings are bound to impress!
Variations & Substitutions
- Different Flavor Combinations: Try adding chopped mushrooms or shredded carrots to the filling for a heartier dumpling.
- Dietary Restrictions: For a gluten-free option, substitute rice flour and tapioca starch with a gluten-free all-purpose blend.
- Seasonal Variations: In spring, toss in some fresh peas or asparagus for a bright, seasonal twist.
Nutrition & Storage Info
- Prep Time: 30 minutes
- Cook Time: 30 minutes
- Total Time: 1 hour
- Yield: Serves 4-6
- Estimated Calories: Approximately 150 calories per serving.
Storage:
- Room Temperature: Best enjoyed fresh but can be stored at room temperature for an hour.
- Fridge: Store in an airtight container for 3 days.
- Freezer: Frozen dumplings can last for up to 3 months.
FAQ Section
-
Can I use frozen garlic chives?
Yes, frozen garlic chives work in a pinch! Just thaw and drain any excess water before mixing. -
How long do these dumplings take to cook?
Steam for 15-20 minutes until firm, followed by frying for crispy edges. -
What if I don’t have rice flour?
You can substitute with all-purpose flour, but the texture will differ slightly. -
Can I make the filling ahead of time?
Absolutely! Just store it in the fridge covered until you’re ready to use it. -
How should I reheat leftovers?
Steam them for freshness or pan-fry to regain crispiness. -
Is the dipping sauce necessary?
While the dumplings are tasty on their own, the sauce adds a delightful tang that enhances the flavors. -
Can I bake the dumplings instead?
Baking is possible, but be aware that you won’t get the same crispiness as frying gives. -
How do I know when the batter is ready?
The batter should become thick and viscous but still pourable when cooked. -
What other dips can I serve?
Try a spicy peanut sauce or a tangy vinegar-based sauce to mix things up. -
Are there vegan options for this recipe?
Yes! All ingredients used here are plant-based, making it a vegan-friendly choice.
Conclusion
Crispy Garlic Chive Dumplings are not just a dish; they’re a celebration of flavors, memories, and culinary creativity. By following this recipe, you’ll find yourself in a warm, comforting space reminiscent of treasured family gatherings. I encourage you to give these a try, and I’d love to hear how they turn out for you! Don’t forget to check out my other recipes on the blog for more delicious adventures in cooking. Happy cooking!

Crispy Garlic Chive Dumplings
Ingredients
Method
- Cut the bottom 1.5 inches off the garlic chives and wash them thoroughly. Slice them into small pieces and place them in a mixing bowl.
- Add salt, sugar, soy sauce, baking soda (if using), white pepper, neutral oil, and minced garlic. Mix well and let sit for at least 20 minutes.
- In a bowl, combine vinegar, water, and sugar, stirring until dissolved. Add sweet soy sauce, soy sauce, and chilies. Mix well and set aside.
- In a pot, combine water, rice flour, and tapioca starch. Stir until smooth and heat on low, constantly stirring until thickened, then remove from heat.
- Fold the prepared garlic chives into the batter until fully incorporated. Grease a 7-inch round cake pan and line the bottom with parchment paper. Pour in the batter and smooth the top.
- Preheat a steamer with boiling water. Place the pan inside and steam for 15-20 minutes until cooked through.
- The top should be slightly firm to the touch.
- Let the dumpling mix cool completely in the pan before cutting into bite-sized pieces.
- In a non-stick pan, heat oil over medium heat. Fry the dumpling pieces on both sides until crispy and golden brown, about 3-4 minutes per side.
- Serve hot with the prepared dipping sauce for a delightful experience!