homemade strawberry ice cream is one of those things I crave the second the weather gets even a tiny bit warm. You know that moment when you open the freezer, hoping there is something good in there, and all you find is a sad bag of peas and that one mystery container you do not trust. Yep, that moment. This recipe fixes it, and it does not taste like a shortcut. It tastes like real strawberries, real cream, and a little bit of summer you can scoop. Also, making it at home feels oddly calming, like you are doing something nice for your future self. 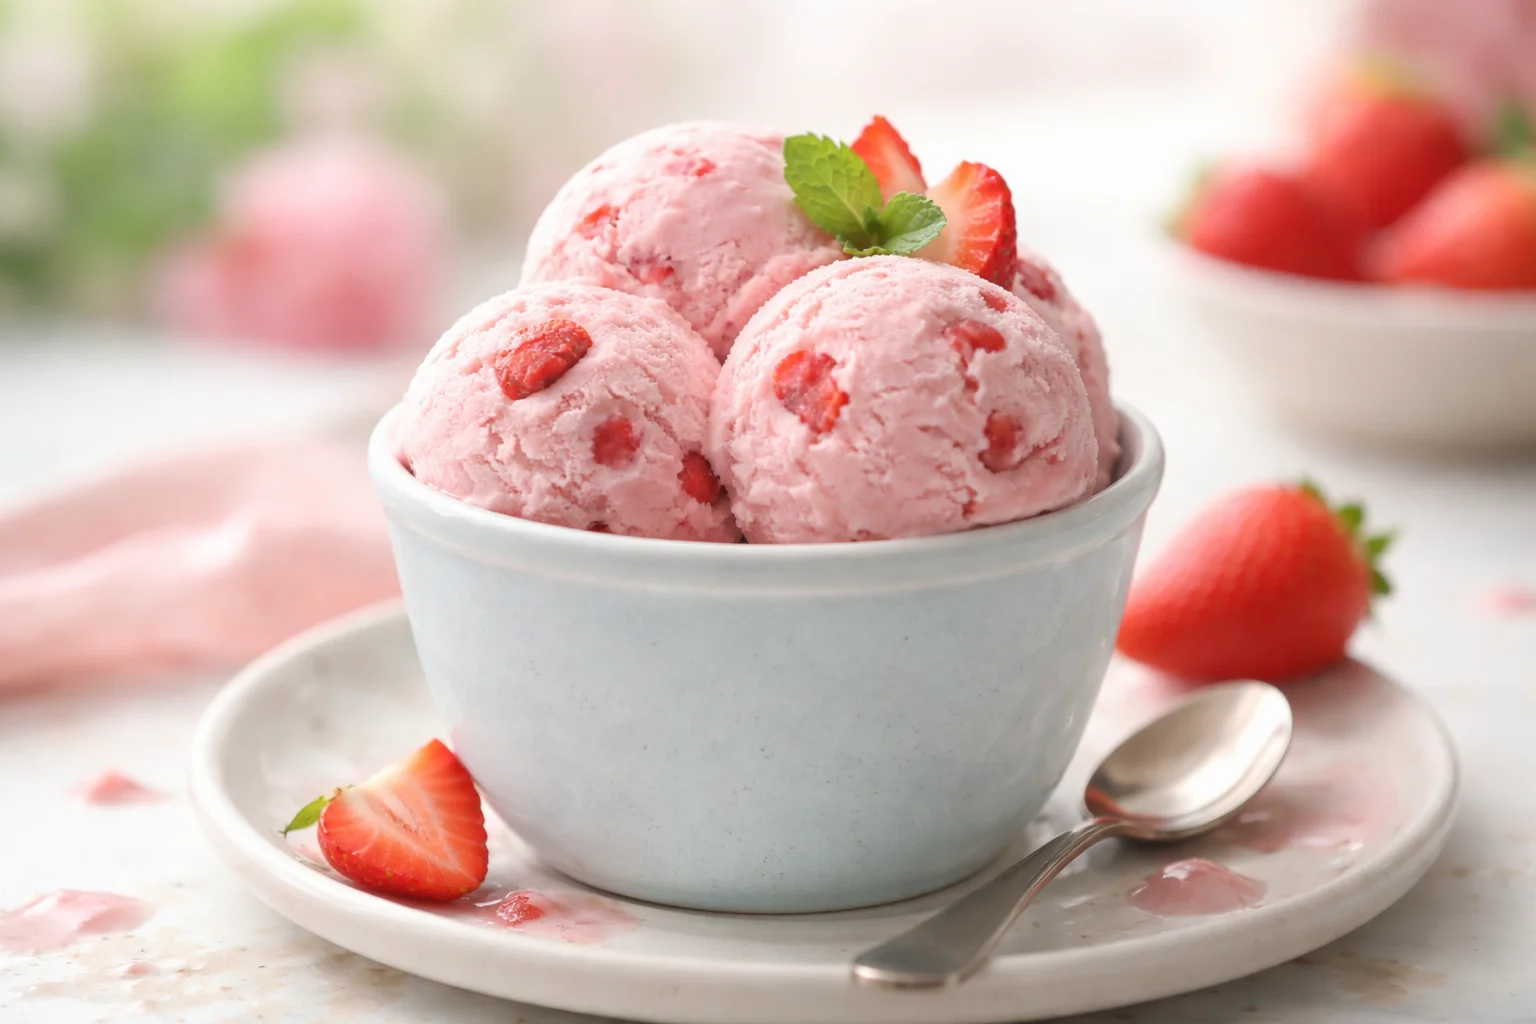
Homemade Strawberry Ice Cream Recipe Overview
This is my go to creamy, berry packed treat when I want something that feels special but still doable on a normal day. The flavor is bright and fruity, and the texture is smooth and scoopable, not icy or crunchy. I have made this for lazy weekends, birthdays, and those random Tuesday nights when I just needed a win.
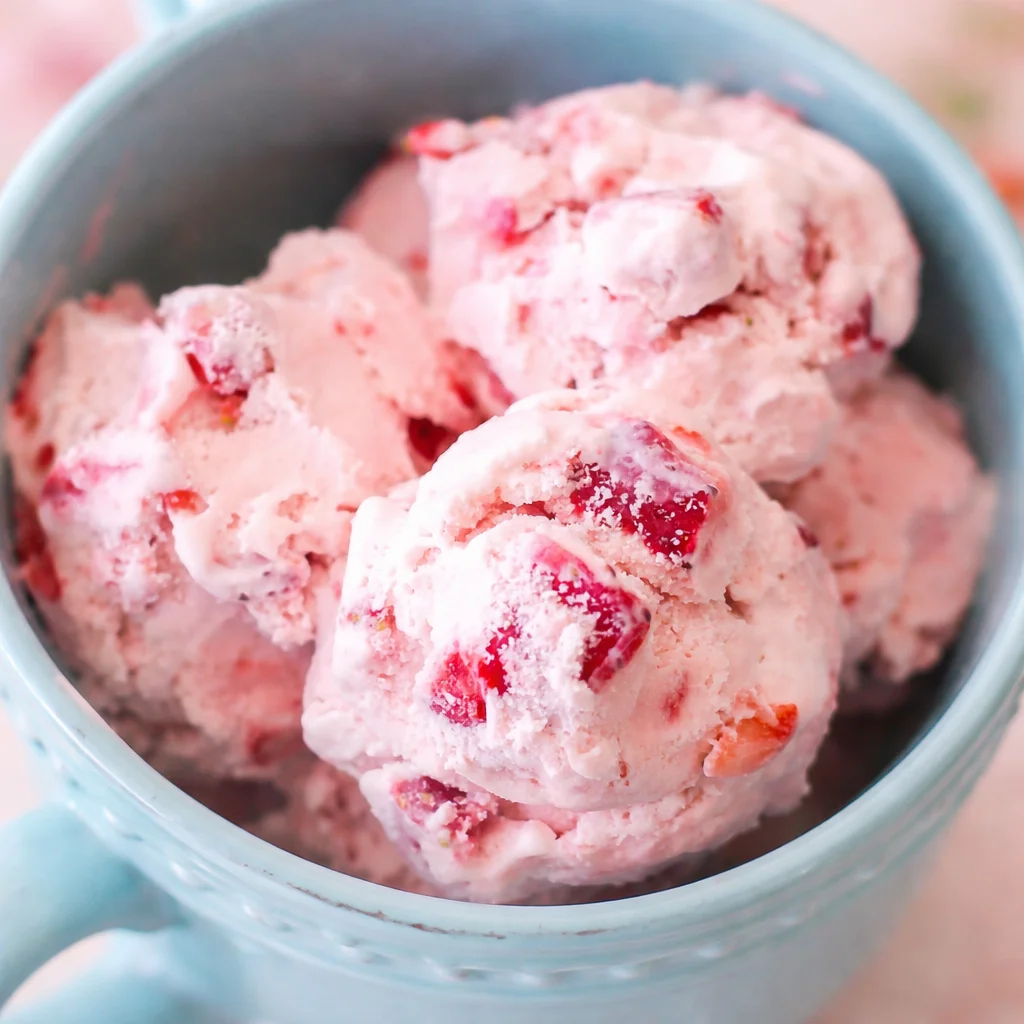
The basic idea is simple: you mash strawberries with sugar to pull out their juice, then mix that into a creamy base, then churn and freeze. The strawberries give you that natural pink color and fresh flavor, and the cream makes it taste like the good stuff from an ice cream shop.
What you will need and quick steps
- Ice cream maker (even a small one works)
- Mixing bowl and spoon or potato masher
- Fine mesh strainer (optional, if you want it extra smooth)
- Freezer safe container with a lid
Here is the quick flow so you can see the whole thing before you start:
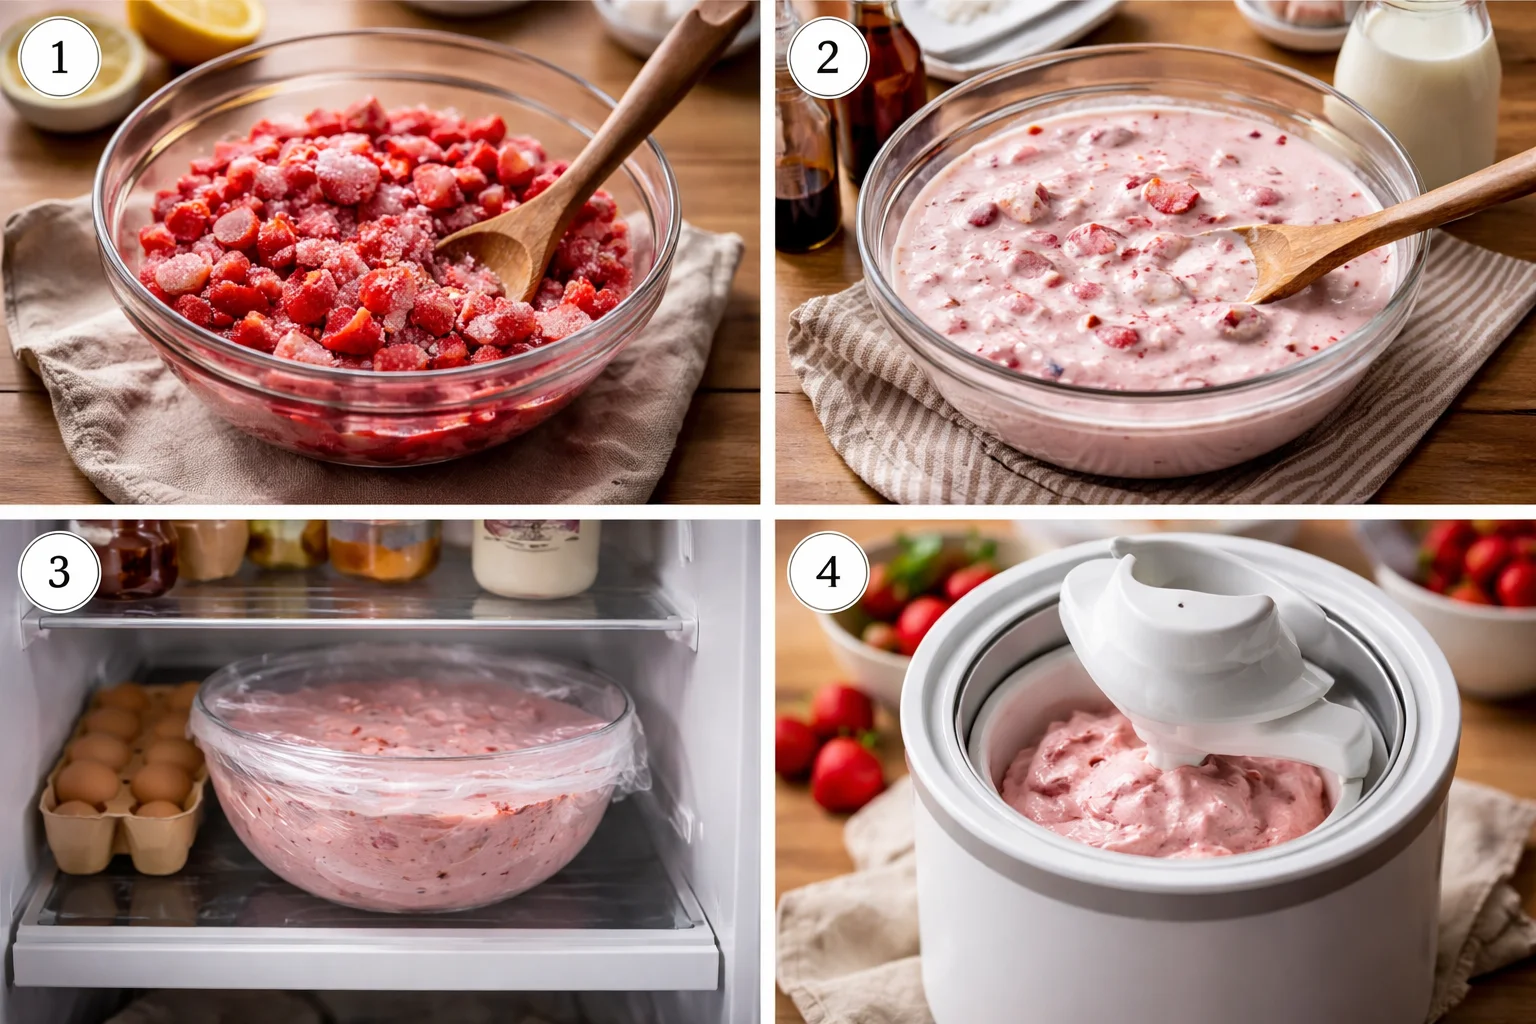
- Mix chopped strawberries with sugar and a pinch of salt, then let them sit.
- Stir together cream, milk, and vanilla, then add the strawberries and their juices.
- Chill the mixture until it is cold.
- Churn in your ice cream maker, then freeze until firm.
I like serving it after it has set for a few hours. If you try to scoop immediately after churning, it is more like soft serve, which is not exactly a bad problem to have.
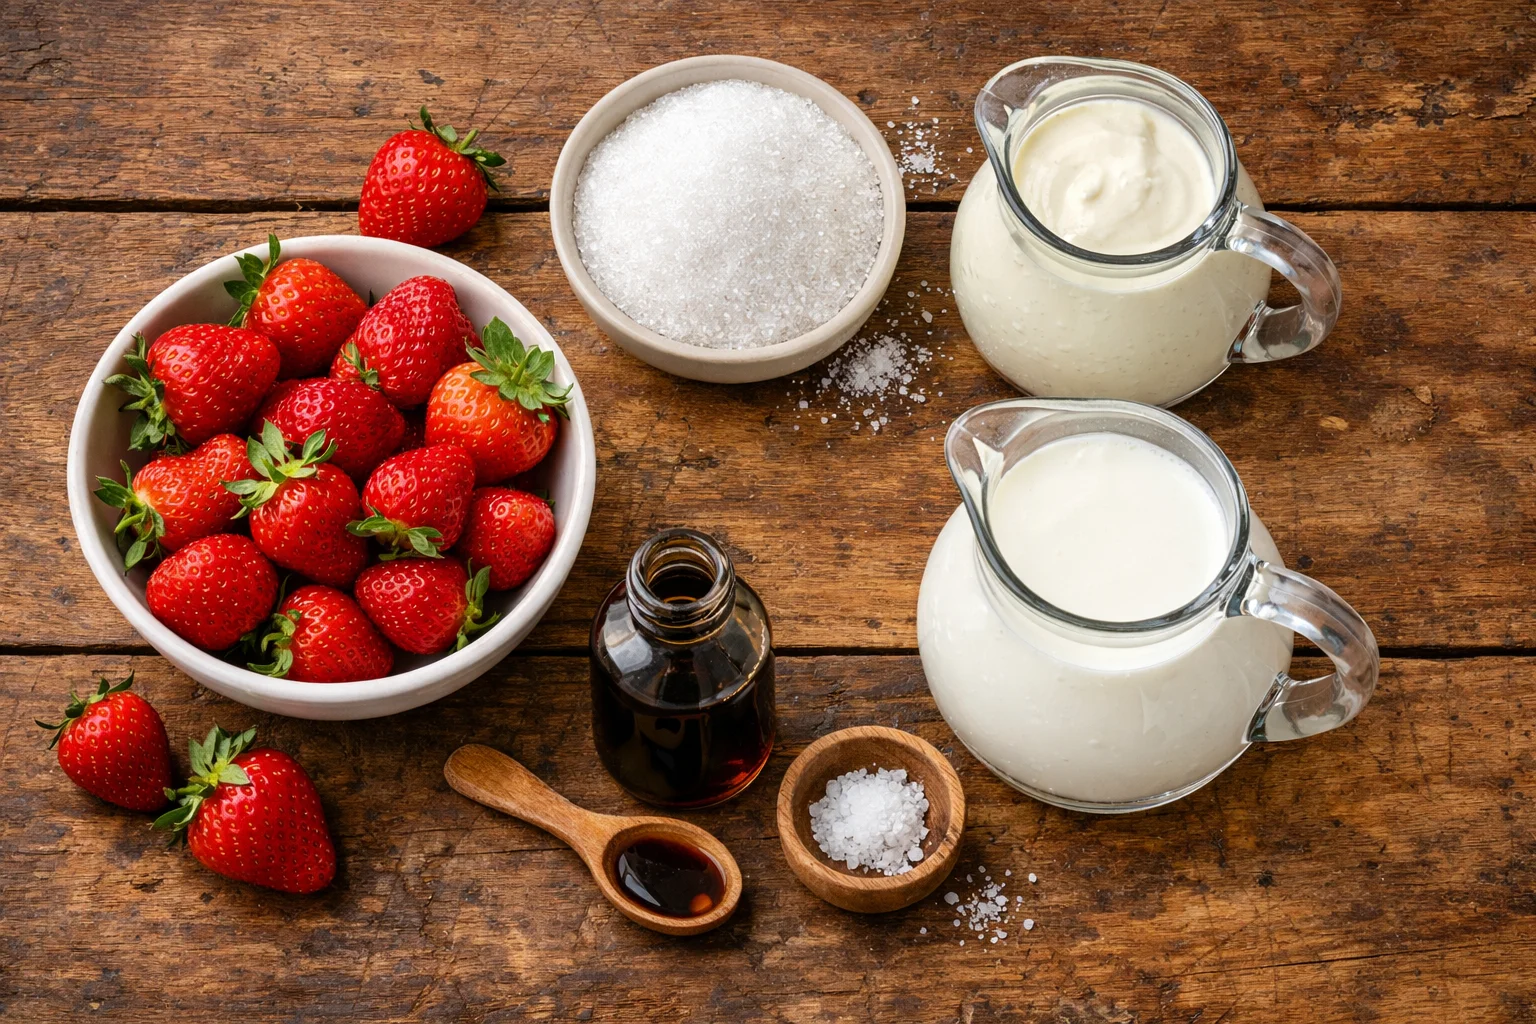
Key Ingredients for Strawberry Ice Cream
If you want that creamy scoop that tastes like real fruit, the ingredients matter, but you do not need anything fancy. I have tested this with expensive berries and with the slightly bruised ones on sale. Both can work if you treat them right.
Strawberries are the star, obviously. Fresh strawberries give the best flavor, especially when they smell sweet before you even cut them. If your berries are a little bland, do not panic. Letting them sit with sugar helps a lot, and a tiny splash of lemon juice can wake them up.
Sugar is not just for sweetness. It helps the fruit get juicy and helps the ice cream stay softer in the freezer. If you reduce the sugar too much, it can freeze harder and feel less creamy.
Heavy cream is what makes this feel rich and smooth. I know it is tempting to swap in half and half or extra milk, but the result will be lighter and more icy. Not terrible, just different.
Whole milk balances the cream so it is not too heavy. You want creamy, not buttery.
Vanilla extract makes the strawberry flavor taste more rounded. It is like turning the volume up without making it louder, if that makes sense.
Salt matters more than people think. Just a pinch makes the strawberry taste pop instead of tasting flat.
If you want little strawberry bits, mash them roughly and keep them as is. If you want a smoother base, you can blend the strawberries briefly or strain some of the seeds. I usually go for somewhere in the middle because I like seeing those little pink fruit ribbons in each scoop.
Essential Tips for Creamy Strawberry Ice Cream
Let us talk about what actually makes homemade strawberry ice cream come out creamy instead of icy. I have had both results, and trust me, once you learn a few small tricks, you will get the dreamy version more often.
Chill time is not optional
Your mixture needs to be cold before it goes into the machine. Not cool, not sort of chilly, but properly cold. I usually chill it in the fridge for at least 4 hours, and sometimes overnight if I am planning ahead. A colder base churns better and gives you smaller ice crystals, which means a smoother scoop.
Let the strawberries macerate
That is the fancy word for letting strawberries sit with sugar until they get juicy. This step is huge for flavor. I do at least 20 to 30 minutes, and I stir once or twice so the sugar dissolves. The strawberries end up tasting more intense and jammy without cooking them.
Here are a few extra tips I swear by:
Do not overmix after adding the fruit. Stir gently so you keep some texture.
Freeze your container ahead of time. Putting freshly churned ice cream into a cold container helps it firm up faster.
Press parchment or plastic wrap right on the surface before adding the lid. It helps prevent ice crystals on top.
“I made this for my kids and my husband kept sneaking spoonfuls straight from the container. It tasted like real strawberries, not fake syrup, and it stayed creamy even the next day.”
One more thing. When you are ready to scoop, let it sit on the counter for 5 minutes if it is very firm. That short rest makes it scoop like a dream and saves your wrist.
Common Mistakes to Avoid
I have made every mistake on this list at least once, so consider this a friendly warning from someone who has eaten a few too many icy experiments.
Mistake 1: Using watery strawberries without adjusting
If your strawberries are super watery, your base can freeze more icy. The fix is easy: let the berries sit with sugar longer so they release juice, then mash them well. If they are still very watery, you can drain off a little juice and save it for smoothies.
Mistake 2: Skipping the chill
Warm or lukewarm base in the ice cream maker usually means slower freezing, and that can mean bigger ice crystals. Chill it properly, even if you are impatient.
Mistake 3: Expecting it to be scoopable right away
After churning, it is soft serve. If you want firm scoops, freeze it a few hours. I know waiting is annoying, but it is worth it.
Mistake 4: Cutting sugar way down
I get it, but sugar affects texture. If you need to reduce it a bit, do it gently, and expect a firmer freeze. You can also focus on using very ripe strawberries so you are not relying on sugar for flavor.
Mistake 5: Storing it uncovered or in a flimsy container
Air is the enemy in the freezer. Use a container with a tight lid and press something against the surface to protect that creamy texture.
The goal is that classic creamy homemade strawberry ice cream vibe, where the spoon glides through and the strawberry flavor tastes fresh, not sharp or icy.
Variations on the Classic Strawberry Ice Cream
Once you have the base down, it is honestly fun to play with. This is where homemade strawberry ice cream becomes your personal thing, like your signature scoop.
Strawberry cheesecake: Add small chunks of cream cheese (softened, then mixed with a little sugar) and sprinkle in crushed graham crackers right at the end of churning. The crackers soften slightly and taste like crust.
Strawberry chocolate chip: Stir in mini chocolate chips or shaved dark chocolate during the last minute of churning. Strawberry and chocolate is a classic for a reason.
Strawberry swirl: Warm a spoonful of strawberry jam and swirl it in after churning. Do not overmix. You want ribbons.
Dairy lighter option: You can use more milk and less cream, but just know the texture will be less rich. If you go this route, chill it extra well and expect it to freeze a bit firmer.
Roasted strawberry: If your berries are not very sweet, roasting them makes the flavor deeper. Just roast chopped strawberries with a little sugar until they look glossy, cool completely, then mix in. It tastes a little more caramel like.
No matter what twist you choose, keep the mixture cold, give it time to churn properly, and you will still end up with a creamy, scoopable treat.
Common Questions
Can I make this without an ice cream maker?
Yes, but it will be less airy. Pour the cold mixture into a shallow pan, freeze, and stir vigorously every 30 to 45 minutes for about 3 to 4 hours. You will still get a nice strawberry flavor, just a bit more dense.
Can I use frozen strawberries?
Yes. Thaw them fully first, then drain off a little extra liquid if they seem very watery. The flavor can still be great, especially if you add a tiny squeeze of lemon.
How long does it keep in the freezer?
It is best within 1 to 2 weeks for the creamiest texture. It is safe longer, but it can start tasting more freezer like and get a bit icy.
Why is my ice cream hard as a rock?
Usually it is from low sugar, low fat, or too much water from the fruit. Let it sit out for 5 to 10 minutes before scooping, and next time keep the sugar level reasonable and chill the base well.
Do I need to strain out the seeds?
Not unless you hate them. I usually leave them in because it feels more real, but you can strain part of the strawberry mash if you want it extra smooth.
A sweet final scoop to send you off
If you take anything from this, let it be this: chill the base, let the berries get juicy, and do not rush the freezer time. That combo is what makes homemade strawberry ice cream taste creamy and not icy. If you want to compare notes with other home cooks, I also like reading this Homemade Strawberry Ice Cream – A Latte Food version and this super approachable Easy Strawberry Ice Cream – Like Mother, Like Daughter recipe. Now go grab some strawberries and make a batch, because you deserve a freezer that actually makes you happy when you open it. 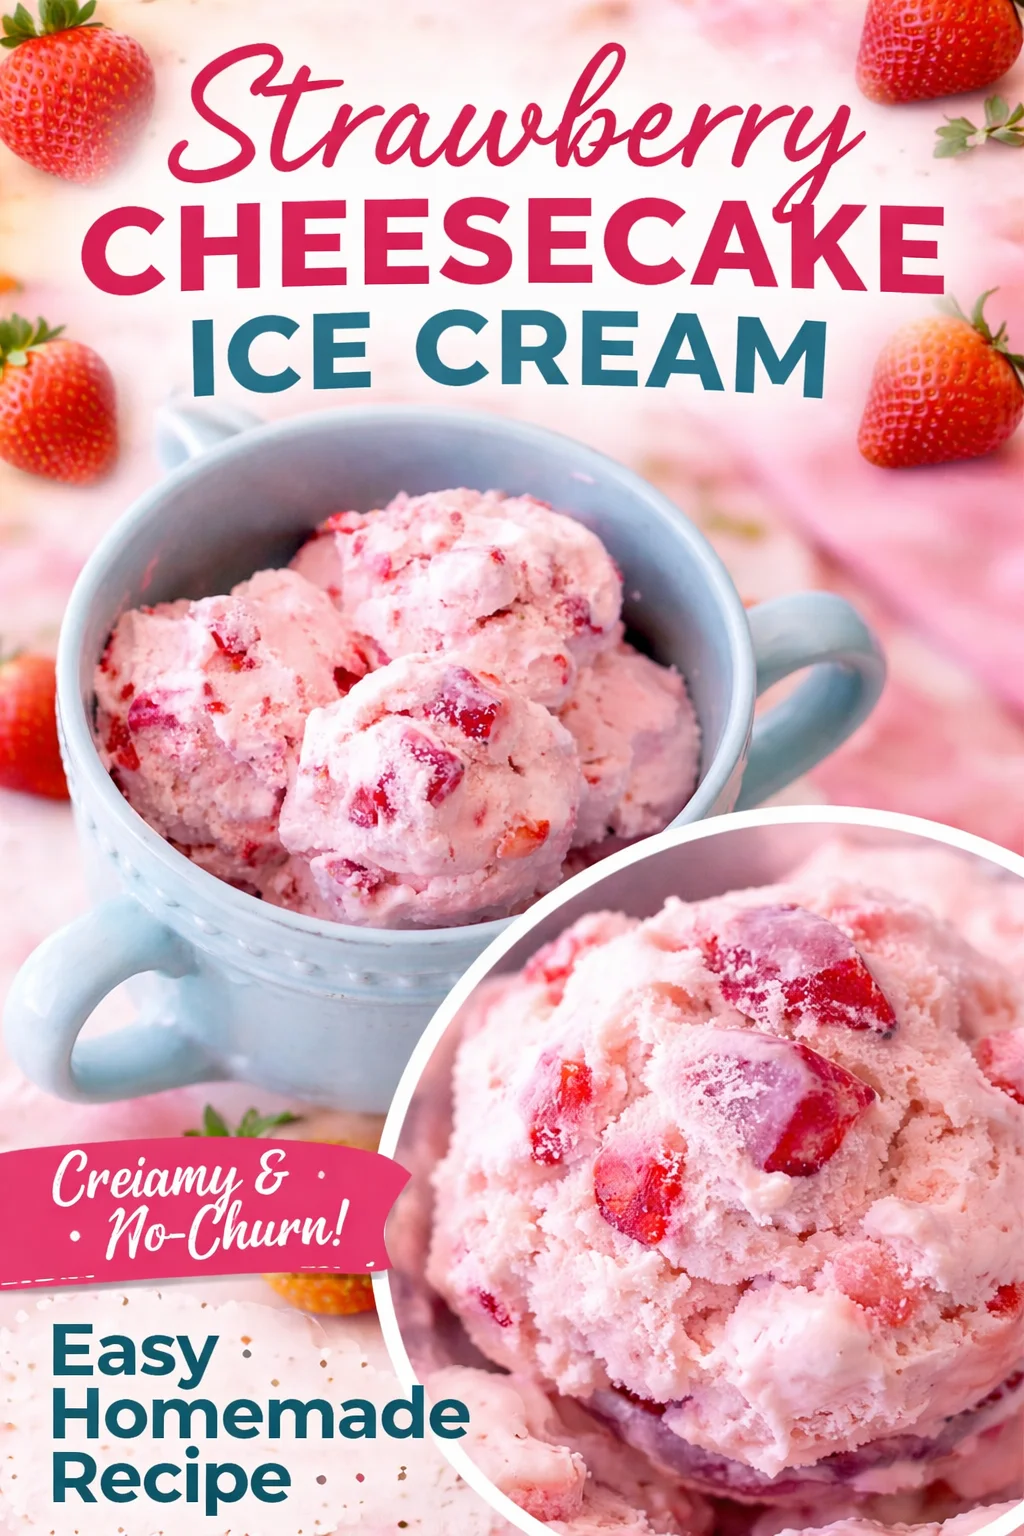
Homemade Strawberry Ice Cream
Ingredients
Method
- Mix chopped strawberries with sugar and a pinch of salt, then let them sit for at least 20 to 30 minutes to macerate.
- In a separate bowl, stir together cream, milk, and vanilla.
- Add the strawberries and their juices to the cream mixture and stir gently.
- Chill the mixture in the refrigerator for at least 4 hours, or overnight, until cold.
- Churn the cold mixture in your ice cream maker according to the manufacturer's instructions.
- Transfer the churned ice cream to a freezer-safe container and freeze until firm, about 4 hours.