Crispy Fried Shallots: The Ultimate Crunchy Topping You Can’t Resist!
I still vividly remember my first taste of Crispy Fried Shallots. It was during a bustling family dinner, the kitchen was filled with laughter, and the air was aromatic with the sizzling sounds of frying. As a child, I couldn’t quite understand the magic behind those little golden morsels, but I knew they added a special crunch that made our meals feel extra festive. Fast forward to today—Crispy Fried Shallots have become my secret weapon in the kitchen, elevating everything from soups to salads and even rice dishes!
What makes my recipe for Crispy Fried Shallots stand out? It’s all about the balance of flavors and the joy of crafting something from scratch. Unlike store-bought versions that might leave you wanting more, my shallots are perfectly seasoned and crispy, providing an unbeatable texture and flavor for all your favorite dishes. This recipe isn’t just about frying up some onions; it’s about creating a crunchy comfort that evokes warm memories and family traditions.
In this blog post, I promise to guide you through making the crispiest, most flavorful Fried Shallots you’ve ever tasted. Get ready to embrace your inner chef while we whip up a batch that will leave your taste buds dancing in delight!
What Are Crispy Fried Shallots?
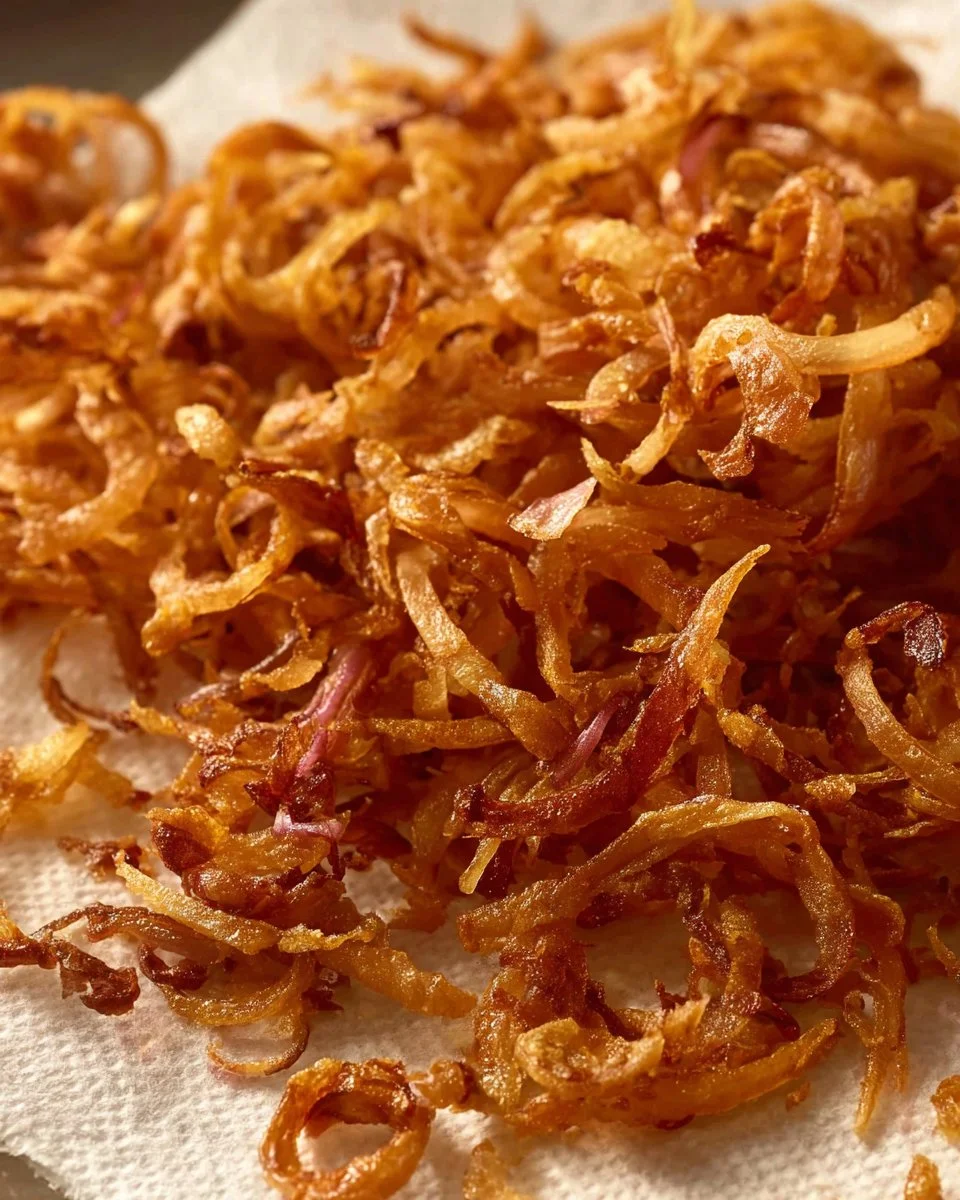
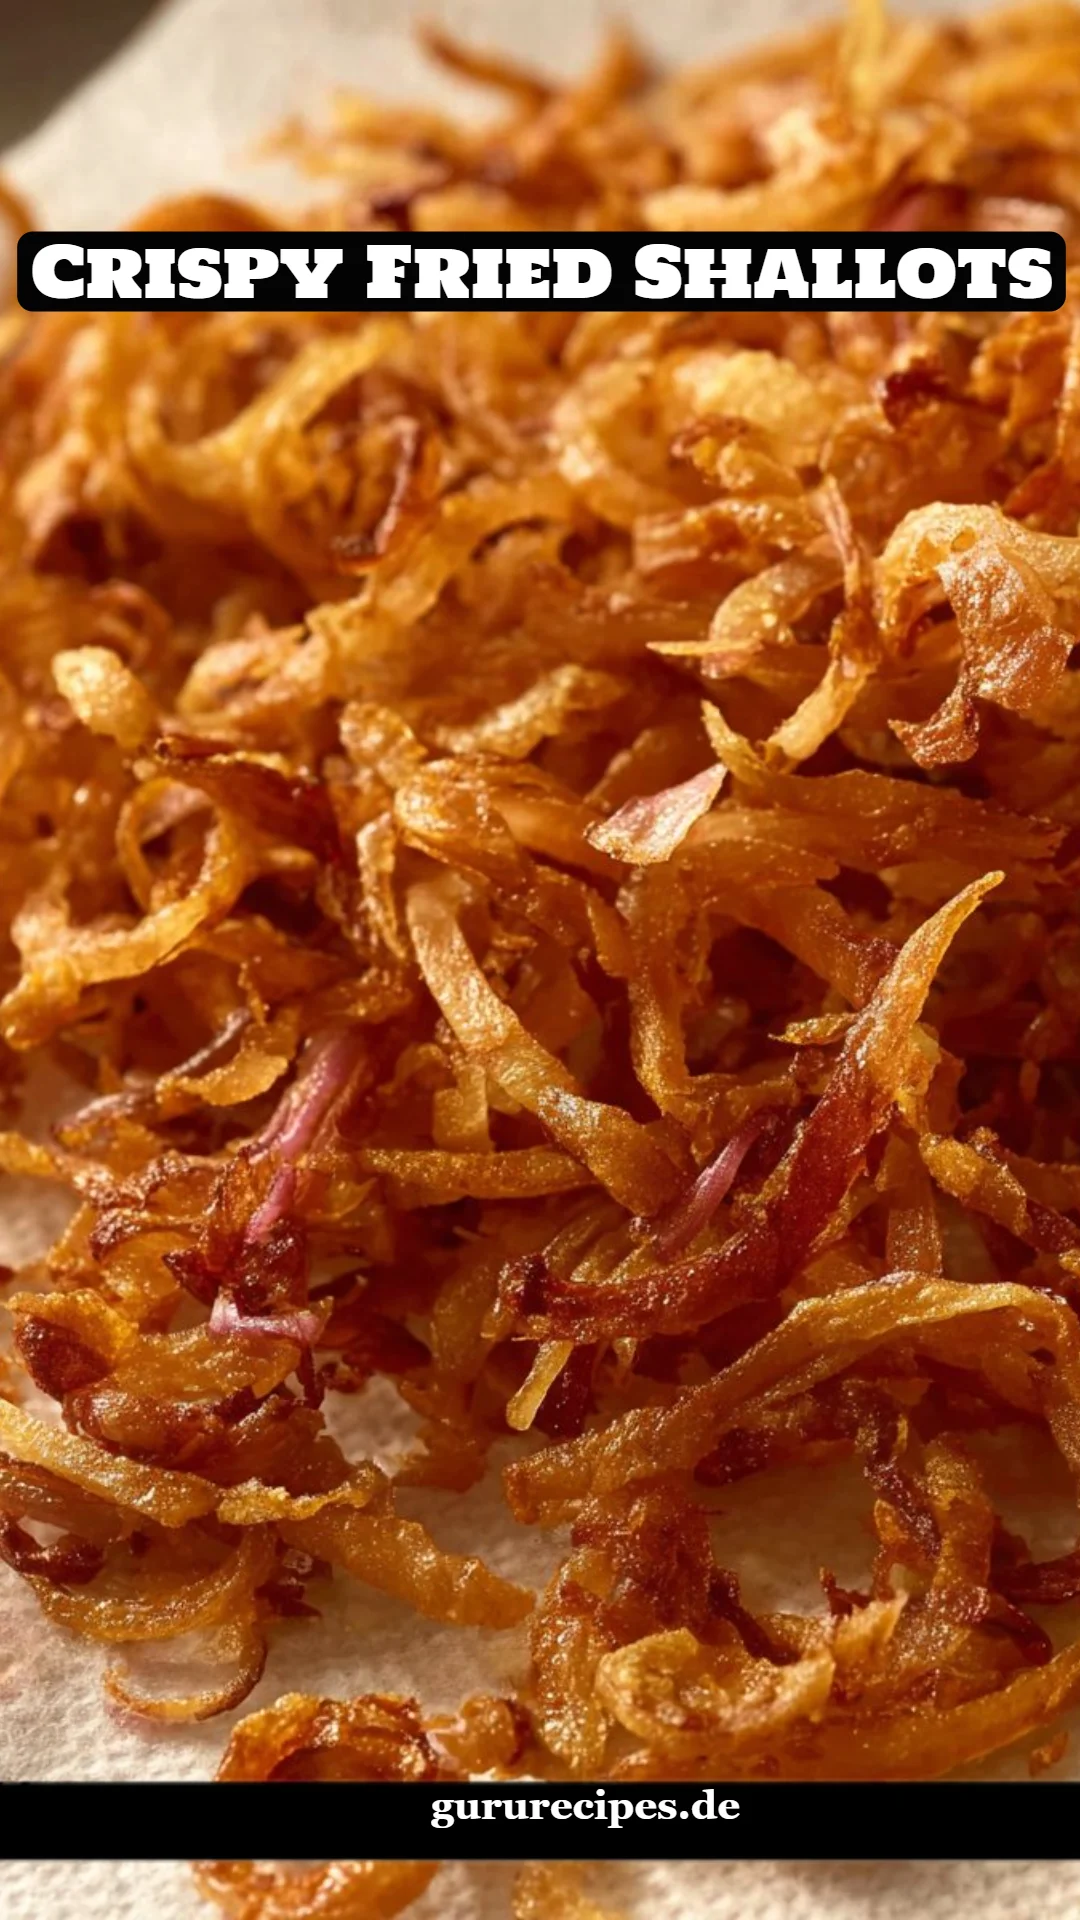
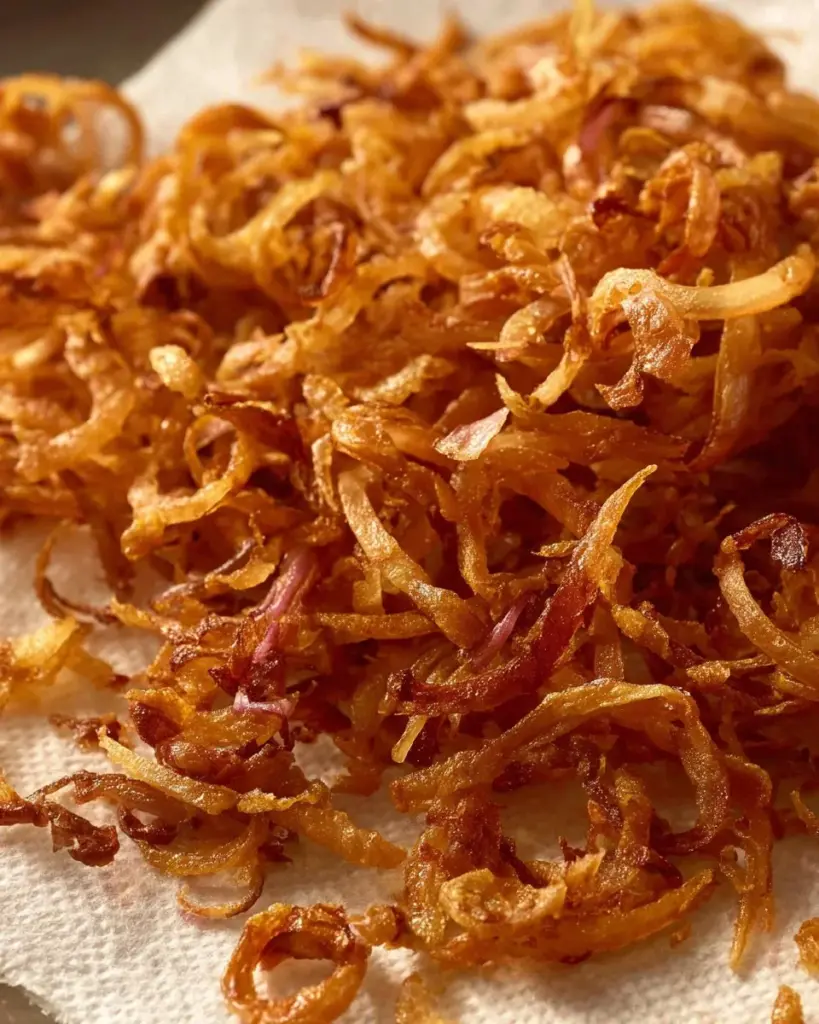
Crispy Fried Shallots have a rich culinary history, originating in Southeast Asian cuisine and spreading across many cultures, each with unique techniques and flavors. Essentially made by thinly slicing shallots and frying them to golden perfection, they offer a delightful crunch and a subtly sweet, aromatic flavor.
The texture is what sets these shallots apart—crispy and brittle on the outside, with a tender sweetness inside. When you bite into them, they unleash a sweet, savory taste that elevates any dish, from stir-fries to noodles, or even as a topping for creamy soups.
You might want to make these little delights when you’re craving that extra crunch or when you want to impress your guests with a homemade touch that’s easy to prepare. Trust me; once you start making these Crispy Fried Shallots at home, you’ll understand why they’ve become a beloved staple in kitchens everywhere.
Why You’ll Love This Recipe
-
Freshness Over Processed: Homemade Crispy Fried Shallots stomp all over store-bought versions in terms of flavor and freshness. When you fry them yourself, you control the quality of the shallots and the oil, ensuring a taste that can’t be duplicated.
-
Cost-Effective: Believe it or not, making Crispy Fried Shallots at home is incredibly budget-friendly. Three large heads of shallots yield a generous amount, far surpassing the meager servings you’d get from a pricey jar at the store!
-
Customization Options: Whether you like them spiced, seasoned, or plain, the customization opportunities are endless! Add your favorite spices or herbs to the frying oil for a unique flavor profile.
-
Ease of Preparation: This recipe ranks low on the difficulty scale and doesn’t require any special skills. If you can slice, fry, and drain, you’re already a pro at making these crunchy delights!
-
Quick Time Investment: From prep to finish, you’ll have these crispy beauties ready to serve in about 30 minutes. They’re perfect for last-minute additions to your meals or for batch cooking to have on hand.
Ingredients Section
-
3 large heads shallots: Look for firm, blemish-free shallots for the best flavor. Onion or green onion can be substituted in a pinch, but shallots bring that perfect sweetness!
-
A pinch of salt: Sea salt or kosher salt works wonderfully to enhance the flavor.
-
Frying oil (as needed): Choose a neutral oil with a high smoke point, such as canola, vegetable, or peanut oil to maintain the shallots’ delicate flavor.
Preparation Notes: Ensure your shallots are at room temperature before slicing for better frying results.
Step-by-Step Instructions
-
Slice the Shallots: Begin by slicing shallots evenly, crosswise, into 1/16 inch thick pieces. This ensures they cook uniformly, so no piece ends up soggy.
-
Salt the Shallots: Place the sliced shallots in a bowl, adding a pinch of salt. Toss them to mix, then let them sit for about 10 minutes. This step draws out excess moisture, ensuring they become crispy rather than soggy.
-
Dry the Shallots: After 10 minutes, spread the shallots on a paper towel-lined plate, pressing another paper towel on top to absorb moisture. This is a crucial step for achieving that ultimate crunch.
-
Prepare the Oil: In a wok or a large pot, pour in enough oil to fully submerge the shallots (around 3 inches deep). Heat the oil over medium-high heat. To check if the oil is hot, drop in a single shallot slice; if it sizzles and bubbles up, the oil is ready.
-
Fry the Shallots: Carefully reduce the heat to low and add the remaining shallots in batches. Stir frequently to ensure every piece gets an even golden color. Fry for about 5-8 minutes, or until the shallots are golden brown.
-
Drain and Cool: Use a mesh skimmer to remove the fried shallots, draining them on paper towels to absorb excess oil. Leave them to cool completely; they will crisp up even more as they cool.
-
Storage: Once cooled, store your Crispy Fried Shallots in an airtight container at room temperature. They’ll stay fresh for up to two weeks—if they last that long!
Chef’s Tips
- Temperature Control: Keep an eye on the oil temperature to prevent burning. If it’s too hot, the shallots can brown too quickly; too low, and they’ll absorb excess oil.
- Batch Frying: Frying in smaller batches helps maintain the oil temperature. This way, every shallot gets the attention it deserves for that perfect crunch!
Expert Tips & Tricks
-
Storage Recommendations: Store your Crispy Fried Shallots in a cool, dry place, preferably in an airtight container to maintain crispness.
-
Make-Ahead Instructions: These fried shallots can be made a few days in advance; their flavor only gets better over time!
-
Troubleshooting: If your shallots become chewy instead of crispy, it may be due to excess moisture—make sure to dry them thoroughly before frying!
-
Flavor Infusion: Consider adding garlic or spices like chili flakes to the oil while frying to impart additional flavors to your shallots.
-
Experiment with Oils: Trying different oils can result in unique flavors. For a nuttier profile, use sesame oil, but beware; it has a lower smoke point!
Serving Suggestions
Crispy Fried Shallots are incredibly versatile! They make a stunning topping for:
- Soups: Sprinkle on top of creamy soups like butternut squash or potato leek for added texture.
- Salads: Add a crunchy element to your greens for a contrast in flavor and texture.
- Rice & Noodles: Elevate your favorite dishes with a sprinkle of these beauties to add texture and flavor.
- Presentation Ideas: Serve them in a small bowl alongside your main dishes so guests can add as little or as much as they like.
For special occasions like family gatherings, birthdays, or potlucks, Crispy Fried Shallots are an instant conversation starter!
Variations & Substitutions
-
Flavor Enhancements: Try adding a sprinkle of smoked paprika or garlic powder before frying for a smoky twist.
-
Dietary-Friendly Options: For a gluten-free option, ensure the oil is not contaminated with gluten-rich foods during frying.
-
Seasonal Variations: Around the holidays, blend in festive spices such as nutmeg or allspice for a unique take that pairs well with seasonal dishes.
Nutrition & Storage Info
- Prep Time: 10 minutes
- Cook Time: 15-20 minutes
- Total Time: 30 minutes
- Yield: About 1 ½ cups fried shallots
- Estimated Calories: ~50 calories per tablespoon
- Storage: Keep at room temp for up to 2 weeks. For longer storage, freeze for up to 2 months, but they may lose some crunch.
FAQ Section
-
Can I use onions instead of shallots?
Yes, you can—though the flavor will differ. Shallots provide a subtler sweetness. -
How do I know when the shallots are done frying?
They should be a rich golden brown. Watch closely as they can quickly go from perfect to burnt. -
Can I add spices to the frying oil?
Absolutely! Add spices like garlic or pepper in the oil before frying shallots for infused flavors. -
What’s the best storage method?
Use an airtight container at room temperature to keep them crispy. -
How long do they last?
They can last up to 2 weeks at room temperature if stored properly. -
Is it necessary to salt the shallots before frying?
Yes! Salting helps draw out moisture, which is crucial for crispiness. -
What oil is best for frying shallots?
Use oils with a high smoke point, like peanut or canola oil. -
Can I make these in an air fryer?
While you could experiment with an air fryer, traditional frying yields the best texture. -
Can I double or triple this recipe?
Definitely! Just fry in batches to keep the temperature consistent. -
What dishes pair well with crispy fried shallots?
They complement everything from soups and salads to rice and noodle dishes.

Conclusion
This Crispy Fried Shallots recipe is so much more than just a way to add flavor to your dishes; it’s a way to connect with culinary traditions and create memorable moments around the table. When you try making your own shallots, you’ll not only elevate your meals but also create a little piece of kitchen magic.
I’d love to hear how your batch turns out! Have you made any delightful variations or served them alongside a dish that wowed your guests? Drop a comment below to share your experience! And don’t forget to check out my other recipes on the blog for more delicious ideas to fill your kitchen with love and flavors. Happy cooking!
Crispy Fried Shallots
Ingredients
Method
- Slice the shallots evenly, crosswise, into 1/16 inch thick pieces.
- Place the sliced shallots in a bowl, adding a pinch of salt and let them sit for about 10 minutes.
- Spread the shallots on a paper towel-lined plate, pressing another paper towel on top to absorb moisture.
- In a wok or a large pot, pour enough oil to fully submerge the shallots and heat over medium-high heat.
- To check if the oil is hot, drop in a single shallot slice; if it sizzles, the oil is ready.
- Reduce the heat to low and add the sliced shallots in batches. Stir frequently for even cooking.
- Fry for about 5-8 minutes, or until the shallots are golden brown.
- Use a mesh skimmer to remove the fried shallots, draining them on paper towels.
- Once cooled, store the crispy fried shallots in an airtight container at room temperature for up to two weeks.